Sump Update -some 3dprinted Parts To Make Life Easy
After 3 years I have finally done some finishing touches to the sump. Although no new equipment I have been industrious and printed out a few parts on the 3DPrinter. Its actually got more room now as I used to run 2 x TLF150 reactors in there, 1 for carbon and 1 for rowaphos. I now use passive carbon in a bag and I got the small Innovative Marine mini-max all-in-one reactor for the GFO. You can easily control the flow rate and changing media is fantastic, no more having to take the entire reactor out of the sump. You just extract the centre section of the reactor, it simply lifts up. this has been good for me as I only need to use minimal amount of GFO.
Here's a shot of my poor little sump, small but functional. I still need to get a better (smaller) platform for the skimmer, looking for some egg crate plus will remove the sump for a proper clean over the next two weeks.

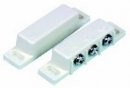
I use the Tunze sock holder / bubble trap which I think is great piece of kit. Although the mount has always bothered me, so I printed a new mount that slides onto the glass and also incorporates the dosing lines. You can also see the probe holder plus my AWC drain pump mount. Ive had trouble in the past with the small tunze 12VDC pumps (normally used for ATO) having water ingress into the motor housing. So I thought Id print a small mount which keeps the motor out of the water. I have my ATO directed onto my skimmer outlet (white tube near my black emergency return) as I run a kalk dispenser outside this is the highest flow area I can dump kalk into the sump. Having the probes in the incomming side of the bubble trap ensures a good flow rate past them.

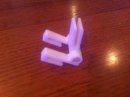
And finally the return section. I personally think covering the return section cut down a lot of evaporation within the cabinet which was good however I had a cover glass just laying on some glass return sections. I've now printed some hinges so its alot easy to simply lift the glass up. Also took the opportunity to print a "peg" which suspends my passive carbon bag in the centre of the return section.

Here's a shot of my poor little sump, small but functional. I still need to get a better (smaller) platform for the skimmer, looking for some egg crate plus will remove the sump for a proper clean over the next two weeks.
I use the Tunze sock holder / bubble trap which I think is great piece of kit. Although the mount has always bothered me, so I printed a new mount that slides onto the glass and also incorporates the dosing lines. You can also see the probe holder plus my AWC drain pump mount. Ive had trouble in the past with the small tunze 12VDC pumps (normally used for ATO) having water ingress into the motor housing. So I thought Id print a small mount which keeps the motor out of the water. I have my ATO directed onto my skimmer outlet (white tube near my black emergency return) as I run a kalk dispenser outside this is the highest flow area I can dump kalk into the sump. Having the probes in the incomming side of the bubble trap ensures a good flow rate past them.
And finally the return section. I personally think covering the return section cut down a lot of evaporation within the cabinet which was good however I had a cover glass just laying on some glass return sections. I've now printed some hinges so its alot easy to simply lift the glass up. Also took the opportunity to print a "peg" which suspends my passive carbon bag in the centre of the return section.
Last edited: